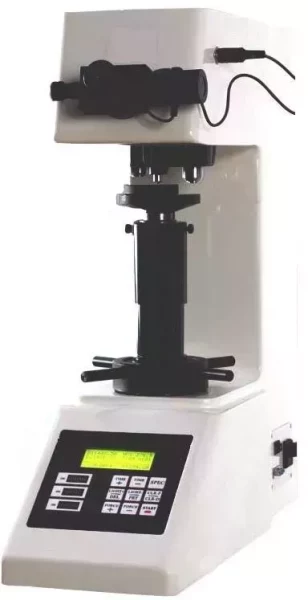
VH-E Vickers Hardness tester
Product description
VH-EM Vickers hardness tester adopts precise structural design, testing force changed from weight to sensor control, it makes the machine with simplicity structure and stable, accuracy force display. This series Vickers hardness tester is controlled by CPU on the whole testing procedure and adopts latest technology, such as high definition optical measurement system, photoelectricity sensing and cold lighting source. With the functions of inputting data through softkey, presetting testing loading time, choosing Knoop testing or Vickers testing, adjusting light intensity, it is also able to display the length of indentation, hardness value, holding time and count of test on the LCD. This series Vickers hardness tester could install CCD device, monitor device and camera head based on customer’s requirement.
Features:
- It is a half automatic and intelligent Vickers hardness testing machine , it adopts the close- loop force sensor to replace the traditional quality weight, this innovate design makes the instrument more accurate.
- Selection of testing force and dwell time is controlled and monitored on the front panel, it is automatic during the process of loading, dwell and unloading.
- It adopts digital microscopes with adjustable LED illuminator, it doesn't need the operator to read the detail length of indention ,it only needs the operator to aim the D1,D2 diameter of indention and press the length key twice, then the built-in computer can compute the Vickers scale
- Equipped with a large LCD screen,
- It doesn't need the operator to read the detail diameter of indention and check the Vickers testing table, it improves the speed and accuracy of hardness testing obviously.
- Hardness conversion among 17 hardness scales, and linking to PC in RS232 interface and cable.
- Mini printer build inside.
Technical specification:
Typ VH-5E VH-10E VH-30E VH-50E
Test load (N) 2.942/4.903 4.903/9.807 4.903/9.807/19.61 9.807/19.61/24.52
9.807/19.61/24.52 19.61/24.52/29.42 24.52/29.42/49.03 29.42/49.03/98.07
29.42/49.03 49.03/98.07 98.07/196.1/294.2 196.1/294.2/490.3
Test load (kgf) 0.3 / 0.5 0.3 /0.5 /1 /2 0.5/ 1 / 2 / 2.5 1/ 2 / 2.5 / 3
1 /2 / 2.5 /3 / 5 2.5/ 3 / 5 / 10 3 / 5 /10 / 20 /30 5 / 10 /20 /30 /50
Carriage control Auto Automatic loading, holding-up and unloading
Load holding time 0 ~ 60 s
Magnification of microscope 100 x (for observation) 100 x (for observation)
400 x (for measurement) 200 x (for measurement)
Meas. microscope if magnification 100x : 0.25 μm if magnification 100x : 0.25 μm
Min. measuring unit if magnification 400x : 0.0625 μm if magnification 200x : 0.125 μm
Measuring range 1HV - 2967HV
Objective magnification 10 x a 40 x 10 x a 20 x
Eyepiece magnificaiton magnification 10 x, resolution: 0.03 mm
Hardness indication LCD display
Auto hardness conversion HRA, HRB, HRC, HV, HK HBW atd.
Lens / indenter switch auto turret
Specimen max. height 170 mm
Specimen max. depth 130 mm
Accuracy conform to EN-ISO 6507, ASTME 10-08, ASTME-384 standards
Power supply 230V/50 Hz
Objectives 10x, 20x a 40x available
Dimensions 535 mm x 225 mm x 580 mm
Packing dimensions 630 x 460 x 710 mm
Weight brutto weight: 70 kg, net weight: 50 kg
Standard delivery:
• buil-in 10x objective • V-shape anvil
• built-in 20x objective • tool box
• 10x digital eyepiece • manual
• Vickers indenter • power cable
• HV1 hardness block
• HV10 hardness block
Optional accessories:
• CCD adapter • Unequal specimen clamp
• CCD camera • Small flat clamp
• 10x digital eyepiece • Mini printer
• Digital CMOS camera • Vickers indenter
• 6.8" LCD monitor • Hardness block (150-750)HV5
• V-shape Anvil • Hardness block (150-750)HV10
• Small bearing clamp • Vickers measuring software with capture card

